Have you ever wanted to build your own website? Maybe you want to have an online portfolio effectively showcasing your work, start blogging, or build up your personal brand. All exciting goals!
It’s easy to become overwhelmed by the pricing and all of the up-front work involved when it comes to building a website. I remember when I first began researching the steps for myself. After reading through all of the steps – concepts such as website hosting, linking a domain name, etc. – I backed away with the impression that it was all way too intimidating.
In recent times, new platforms, such as Squarespace or Wix, have risen with the almighty all-in-one package. No more having to pay for and pull together three different sources, or insert back-end coding (unless you want to, of course).
One of these new resources available for all-in-one website building is Webflow– a platform that provides the ability to create and host your website for free, with no coding required.
As someone who enjoys graphic design, and specifically creating websites (you can check out my personal website here), I was excited to try out Webflow for myself. The ability to build up a personal portfolio is an invaluable skill in the professional world – especially for us artists out there. For my project, I took to creating a sample photography exhibit by using this hot new software. In this post, I’m going to break down how I did it.
But first,
Wait! What About a Domain Name?
To customize your domain with Webflow, you must pay extra. You can get the information on pricing here. Hosting is around $15 a month for their most basic plan. You can choose whether you want to purchase a domain through Google or GoDaddy. Weblfow walks you through the steps to connect with ease! Domain costs vary, but it’s a once-a-year payment. Along with a customized domain name, you get other premium features as well. You can still use the free version to publish a website with a Webflow URL though, which is what I did.
Now that we got that out of the way, here’s the steps I took to build my FREE Webflow site:
Step #1: Creating an Account
First, I clicked the button on their navigation labeled “sign up, it’s free.” That led me to this pop up:

After I created my account, Webflow followed up by asking some questions about my area of business. They also inquired as to what I’d be using the website for to give me recommendations suited to my needs.
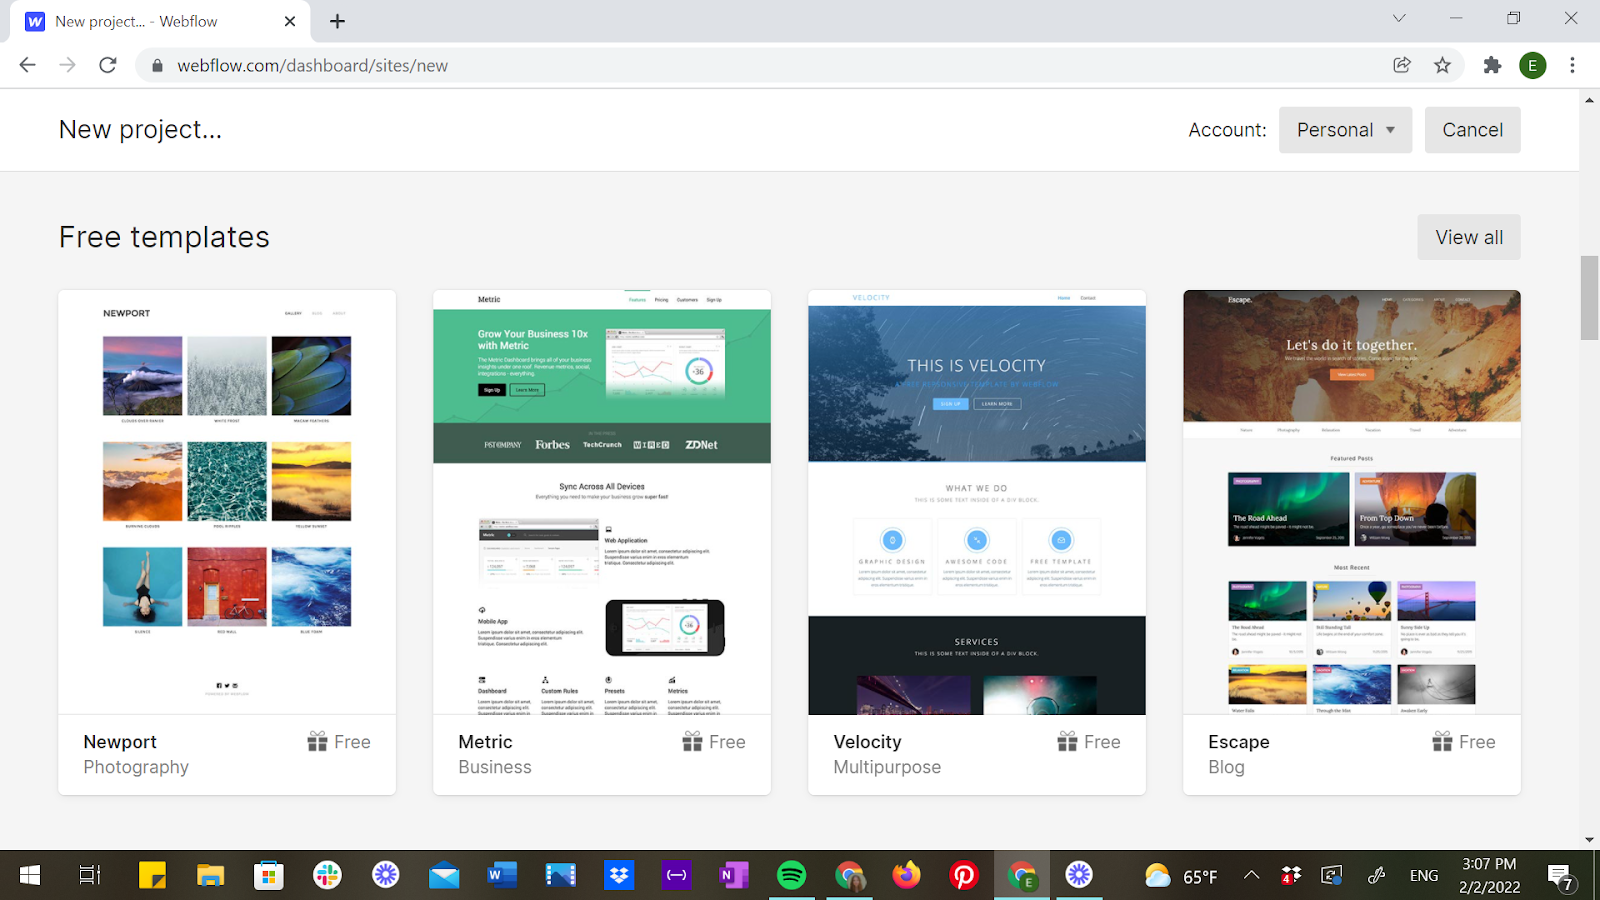
Step #2: Choosing a Template
Webflow has pre-built templates designed as a jumping-off point. Some of them cost money, but they have plenty of free options listed.
After selecting my template of choice, a pop-up asked me to name my new website. I had the option to input a company name or personal one.
If a premium option with a custom domain is not your cup of joe, the name you choose will still become a part of your website’s URL. Mine looks like this:
https://emilys-dapper-site-320ea7.webflow.io/
Step #3: Customizing My New Website!
This is the fun part – the world was my oyster when it came to easy design.
Rename the Headings

By double-clicking on any of the textboxes, I could type in whatever I wanted. I could also change the font by scrolling down to the typography section in the style tab (the brush icon displayed in the right-hand corner) and clicking on the font button. A list of different options popped up that I could try out!
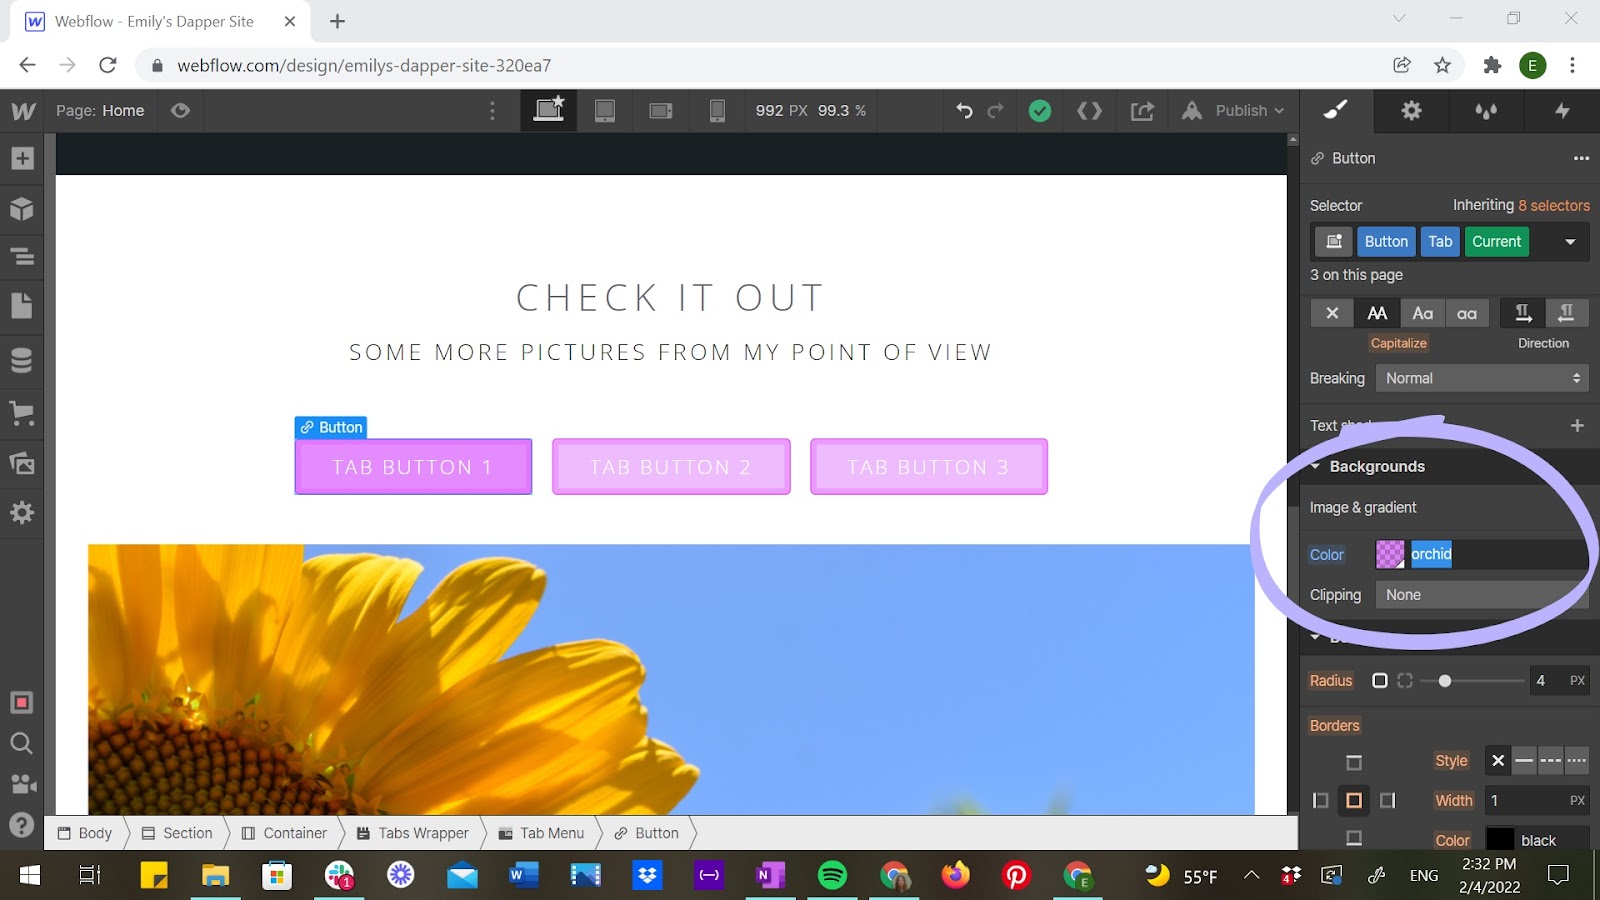
Changing the Color Themes
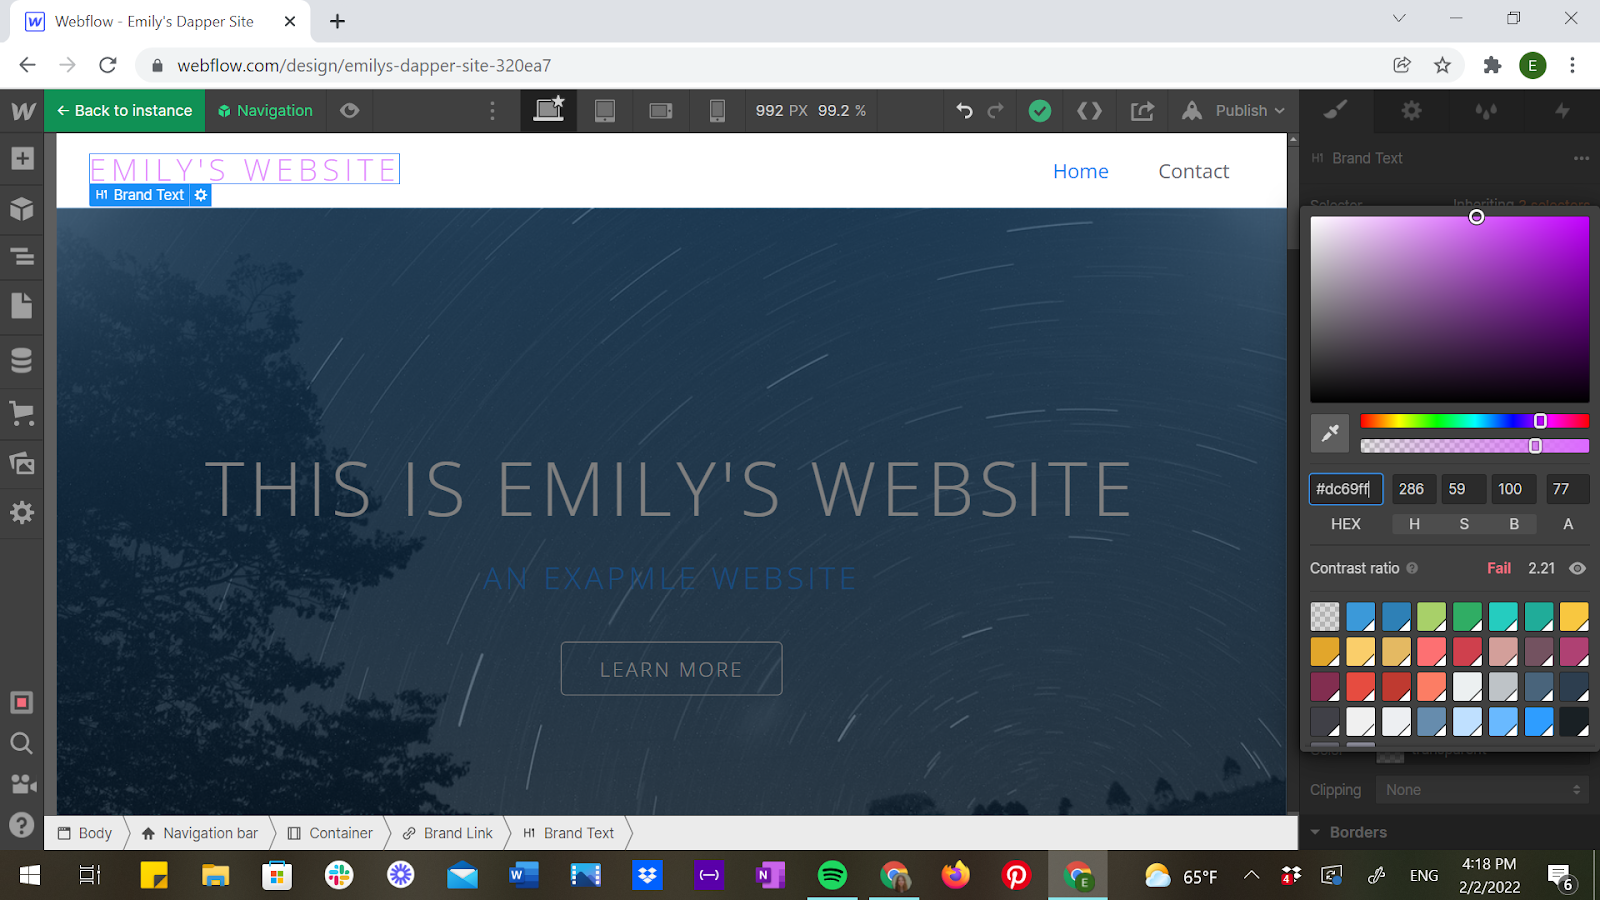
Depending on what I was changing, there were different methods to use. For changing the color of a text, the swatches were under typography. For a background or the color of a button, it was under backgrounds.
Uploading My Own Images
To do this, I double-clicked on any of the image boxes until the images settings pop-up emerged.

I clicked on replace image. When the assets bar opened, I could hover over any photo uploaded under the images tab to see what it would look like on my page before selecting. To upload my own images, I could click the little cloud with an upwards arrow at the top of the bar and choose an image from my desktop files.
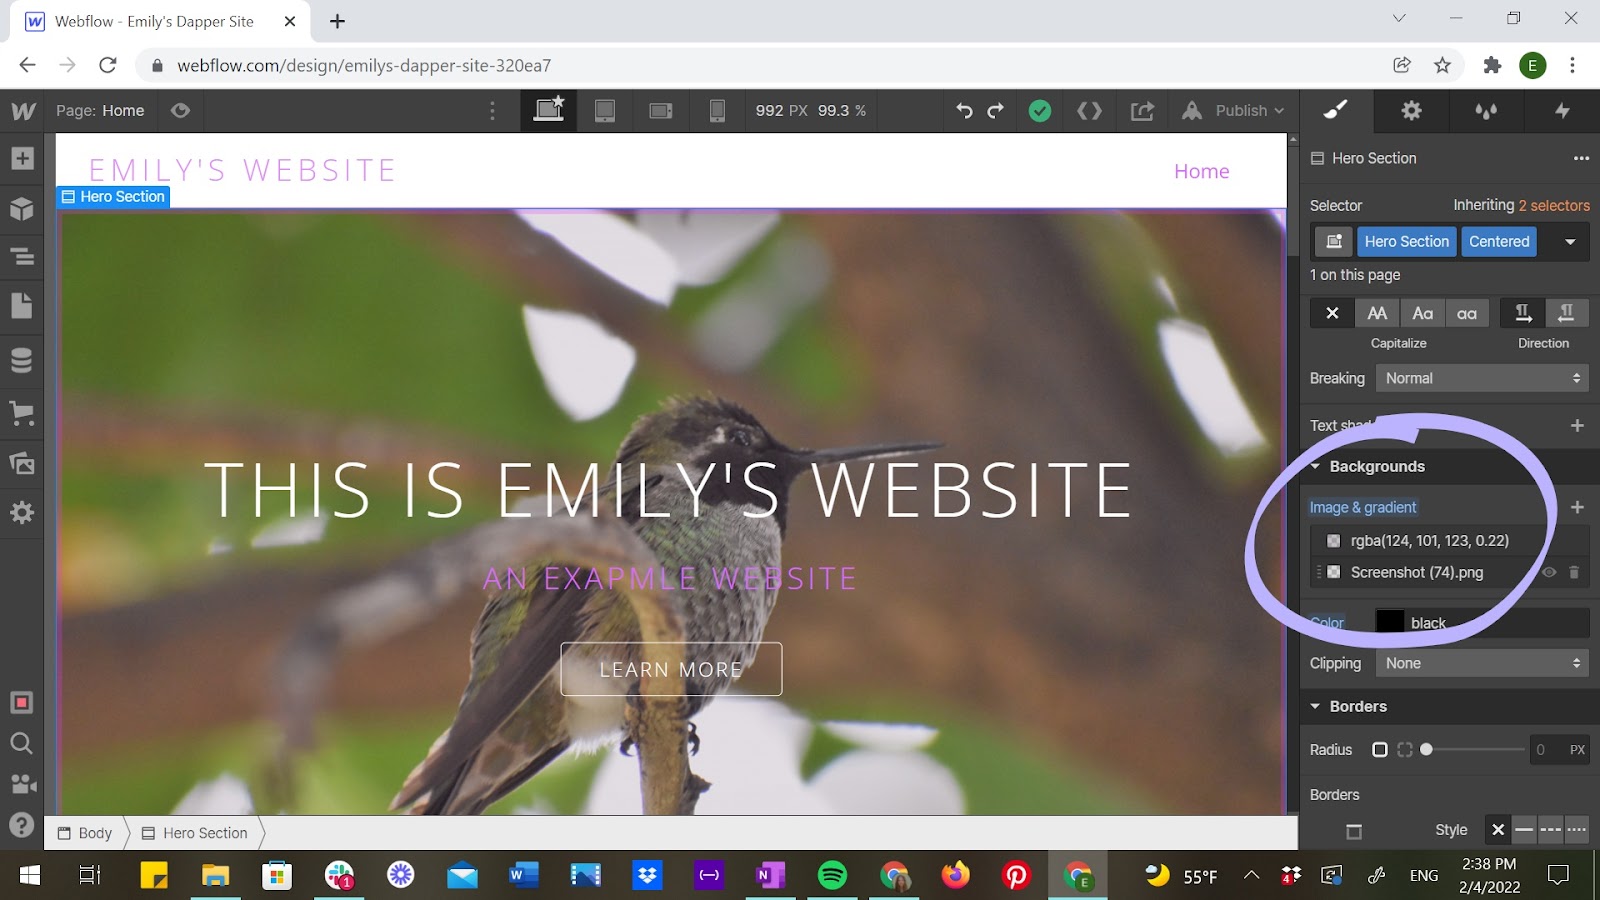
It was slightly different to replace an image that was used as a background. I had to click on the container with the background image I wanted to switch out, and under the background tab, I had to choose the image file that was listed under images & gradient. It then allowed me the option to choose a new image from my uploaded photos.
Step #4: Preview
To get a sneak peek at what my website would look like live, I hit the little eyeball icon at the top-left corner.

This allowed me to see what my website would look like on a desktop, tablet, and phone! To view each setting, I could either tap the icons on the top of the screen, or drag the sidebar to easily slide between views.

Step #5: Publishing My Site
Tada! A basic customization had been completed. To publish the website for the world to see, I clicked publish in the right-hand corner, and then hit publish to selected domains.

If you want to check out this epically built website in live-action, you can visit it here.
There are a ton of customization options!
With this example, I just scratched the surface of possibilities. From adding new pages, sections, buttons, tabs, you name it, the options are nearly endless! But if you want to get a website up quickly with minimal effort, you have the freedom of simplicity. The choice is truly yours!
The Final Verdict
In my experience, Webflow is a user-friendly tool that makes customizing a portfolio website enjoyable. Their features are relatively simple to use, and if any questions arise, Webflow has free tutorials uploaded to Webflow University featuring detailed walk-throughs.
Using Webflow for a portfolio is just the tip of the iceberg. You can dive into blogging, brand-building, eCommerce – with paid plans – and up anywhere from an individual to an enterprise.
And, hey, now I have a beautiful website displaying my photography works, and not only did I have fun building it, but I did it all for free!

Leave a comment